Nodal Part 1
Getting Started with Nodal:
A node.js Framework + Screen-cast + Technical Blog Post
This is part 1 of 3 posts to be paired with screencasts by Nodal creator Keith Horwood. The primary intention is to improve on the available technical material on the Nodal framework. The secondary purpose is to continue iterating on screencast + blog post format that pairs screen-cast video content with static text, code snippets and images typical of technical blogs.
See that little check box floating there in the right margin? Use it to toggle the accompanying screen-cast which this blog post follows. Or use ⌘-↑ to toggle and un-toggle the video layer, and use the space bar to play and pause the video layer when present. If you’re reading on mobile, the video is embedded at the end of the post. See motivations for this format after getting started with Nodal.1
Nodal
Nodal is a node.js web server and framework designed to make it easy to get a node.js server up and running. It’s built with:
- out-of-the-box integration with PostgreSQL
- an object relational model(ORM)
- other abstractions and design patterns from Rails and Django
- a system of command line generators
- implementation using ES6 idioms and syntax
We’re going to use Nodal to create an API for a Twitter clone. We’ll name it instatweet. In part 1 our API we’ll handle tweets. In part 2 and 3 we’ll handle user creation and authentication.
Install
We’ll start with a fresh global install of Nodal to make Nodal generators available at the command line. If you want to see alternatives to global installation of node packages, and the rationale for that approach, you can read more here.
sudo npm install nodal -g
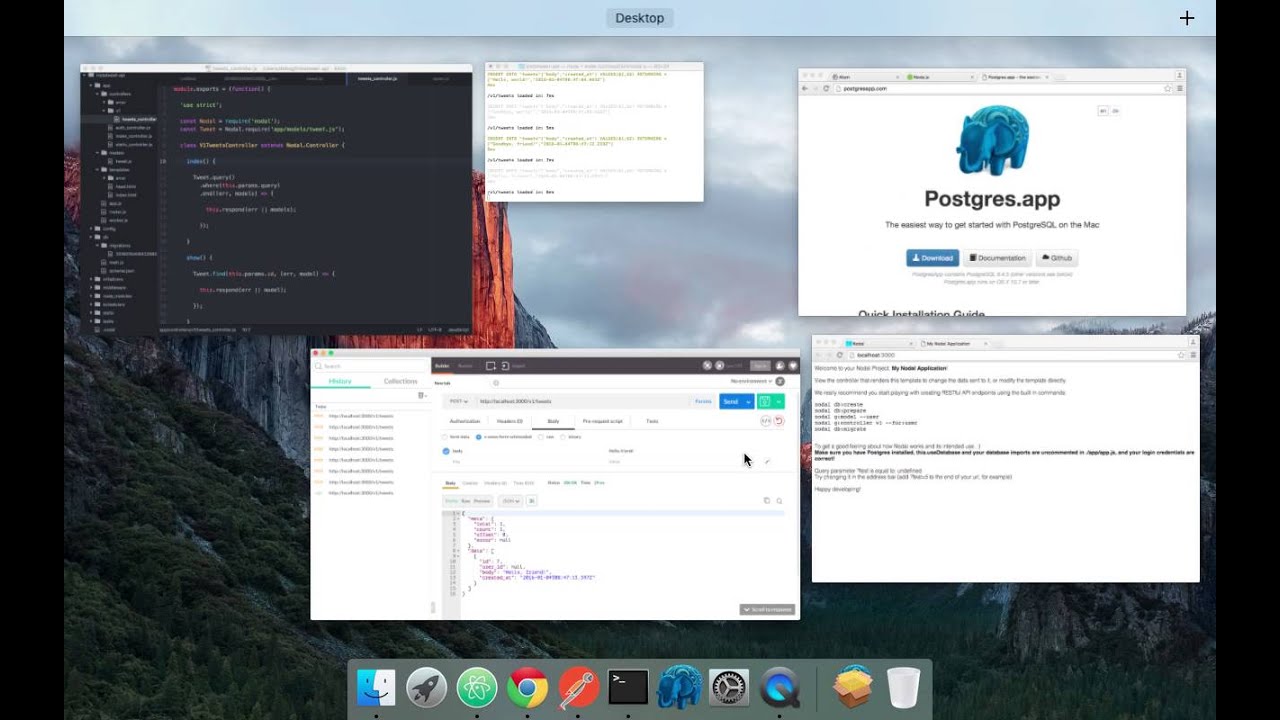
What are we using for this screen-cast + blog post
The Atom text editor, Node version 4.2.4 and Postgres.2
Create a new project
nodal new instatweet-api
Wait a few moments for it to install
$ cd instatweet-api
Start our server
$ run nodal s
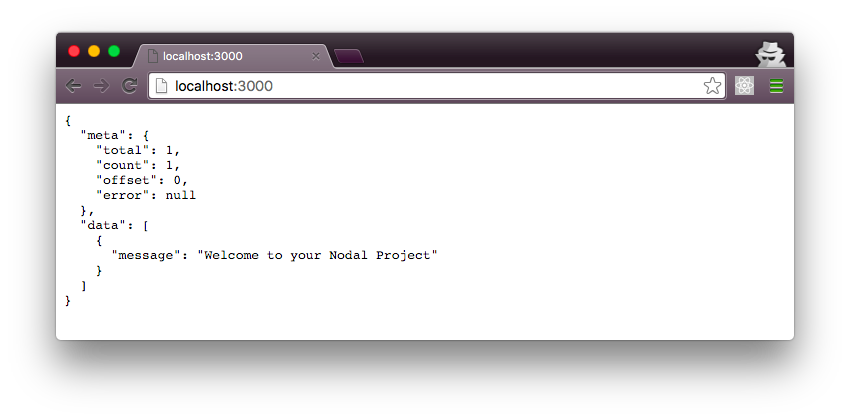
Should be available at localhost:3000
Let’s double check:
Our application Structure
Let’s go one step at a time to avoid getting distracted by everything Nodal has generated for us.
Controllers
Nodal controllers follow the same pattern:
//app/controllers/index_controller.js
module.exports = (function() {

  'use strict';

  const Nodal = require('nodal');

  class IndexController extends Nodal.Controller {

    get() {

      this.respond({message: 'Welcome to your Nodal Project'});

    }

  }

  return IndexController;

})();
Nodal uses immediately-invoked-function-expression(IIFE)3 to wrap modules.
Nodal modules explicitly import dependencies.
Nodal modules emulate classical inheritance by extending a base Nodal class. In this case we extend Nodal.Controller.
Nodal classes implement methods relevant to the concerns of that module that implements them.
Nodal controllers implement methods for handling API requests.
Nodal generates a default IndexController that implements a get() method.
//app/controllers/index_controller.js
class IndexController extends Nodal.Controller {
  get(){
    this.respond(...)
  }
}
The IndexController extends from the Nodal.Controller class, then defines the get() method for the IndexController instance of the Nodal.Controller class. Inside the get() method, we invoke controller’s respond() method to handle a GET request to our API’s index path. This pattern of extending Nodal classes, implementing the methods of their instances, and utilizing Nodal methods in those implementations is consistent across all of Nodal. This pattern is similar to that of frameworks like Rails and Django. ES6 class syntax makes this pattern feel natural in node.js.
Clear and consistent design patterns make Nodal stand out as easy to get started with, powerful enough to address many API needs out of the box and consistent enough to keep your server application logic easy to follow as you extend your server beyond what Nodal generators provide.
Our IndexController handles any GET requests to localhost:3000/ by sending whatever response is passed to this.respond().
Note: At the time of Nodal’s release, when the accompanying video to this blog post was created, Nodal used a .render method to serve an html template to the client on an index GET request. Around release 0.0.7, Nodal became API-first, and dropped all the default html rendering and serving, and changed the default IndexController get() method to use .respond() instead.
We’re interested in generating an API server. We need database integration. We need all these really complicated things that in a current choose-your-own adventure node ecosystem, it’s hard to get up and running.
Let’s keep going.
A Tweet Model:
The first thing we need is a way to store tweets. We’ll use a Nodal generator to create our tweet model4. Each tweet has a user id and a body which is a string.
$ nodal g:model Tweet user_id:int body:string
Nodal provides command line generator tools for creating models. With a couple commands we can generate all the javascript needed to create an API end point set up for traditional CRUD operations.
In Nodal, we define the model, and then Nodal does the work to create a consistent interface between our API end point, our model, our schema and our actual data table in our Postgres database.
You’ll see that the Nodal generator logs the files it creates in your console.
Create: ./app/models/tweet.js
Create: ./db/migrations/2016040820210712__create_tweet.js
Our First Migration:
Nodal uses a specific design pattern for managing our database as we develop our application. This pattern is built on an abstraction called a migration.
Migrations offer a consistent and convenient way to alter your database schema over time. You can think of each migration as being a new version of the database. This is an idea borrowed from Rails, and you can read an in-depth article on migrations here: here
For our purposes, all we need to know is that our Nodal generated
./db/migrations/2016040820210712__create_tweet.js
which extends the Nodal.Migrations class and implements two methods that interface with our Postgres database. These methods are:
// ./db/migrations/2016...UTCTimestamp.js
up(){
  return [
    this.createTable("tweets", [{"name":"user_id","type":"int"},{"name":"body","type":"string"}])
  ];
}

down(){
  return [
    this.dropTable('tweets');
  ]
}
The up method will create a new tweets table using the schema we defined in the command line. The down method will drop that table.
In this way we can roll our database forward, or backward if needed, as we develop our API.
Each time we use the generator to create a new model, we’ll create a new migrations file that contains up and down migrations representing the new tables needed to match our models, and an operation that will drop those new tables and return us to a previous version of our database.
Our First Model
Our command line generator created ./app/models/tweet.js for us as well. Our model follows the same ES6 classical inheritance emulation pattern, extending our Tweet model from Nodal.Model. Our Tweet model sets our db database using a generated config from our db directory. Then it sets the schema for our Tweet using an internal description of our tweet model schema.5.
//app/models/tweet.js

class Tweet extends Nodal.Model {}
Tweet.setDatabase(Nodal.require('db/main.js'))
Tweet.setSchema(Nodal.my.Schema.models.Tweet);

return Tweet;
Back to Migrations: Let’s get our model up and running
$ nodal db:create
This creates an empty Postgres database. Generally, Nodal commands transparently log their activity.
In the case of db:create we get something like this in our console:
CREATE DATABASE "instatweet_api_development"
[]
730ms

Database Info: Created empty database "instatweet_api_development"
This explicitly shows the Postgres command executed to create our empty database, as well as the name of our db.
Next we run:
$ nodal db:prepare
This empties out our database and prepares for migration.6
$ nodal db: migrate
This creates the tables in our database.
$ nodal db:rollback
This roll’s back our database to a prior migration
$ nodal db:migrate
Migrate will roll our database forward again.
Every migration or rollback will print the schema of the current migration for us so we can keep track of what our database looks like at any moment.
Additionally, running db:migrate when a new migration doesn’t exist will return a message saying “no pending migrations exist”. Running db:rollback without having completed any migrations in the first place will throw an error.
Back to Controllers: Let’s make an api endpoint
$ nodal g:controller v1 --for:Tweet
The Nodal generators are smart enough to know that Tweet is a model that we’ve already created. Therefor we can use a flag to specify that we’d like to create a controller for a specific model.
Additionally, we can namespace the controller for our model. The name space is then added to the URL path for our API end point. In this case “v1” is our namespace, which will give us an API end point for tweets that we can access at:
localhost:3000/v1/tweet
As we build features of our API, we can use namespaces to organize those API end points. Practically speaking we could develop v2 of our API, while still maintaining v1 in production.
So what does g:controller v1 –for:Tweet get us?
Create: ./app/controllers/v1/tweets_controller.js
Modify: ./app/router.js
First, we create our v1 name-spaced tweets_controller, which looks like this :
// ./app/controllers/v1/tweets_controller.js
class V1TweetsController extends Nodal.Controller {

  index() {...}

  show() {...}

  create() {...}

  update() {...}

  destroy() {...}

}
Index, show, create, update and destroy are methods corresponding to simple CRUD operations, and the design pattern is based on frameworks like Rails.
Let’s see if we can hit this endpoint.
Using Postman, or curl, or whatever your favorite way to test an API endpoint, lets hit localhost:3000/v1/tweets with a GET request!
{
  "meta": {
      "total":0,
      "count":0,
      "offset": 0,
      "error": null
    },
  "data": []
}
Router
What was actually happening when we hit that tweets endpoint?
Along with generating a controller, the generator command modified ./app/router.js. Here’s the bit to focus on:
// ./app/router.js

...

const V1TweetsController = Nodal.require('app/controllers/v1/tweets_controller.js');

...

router.route(/^\/v1\/tweets\/?/, V1TweetsController);
The Nodal generator explicitly required our namespaced tweets controller, created a regex for it, and created our new route for us.
Nodal implements routes using a regex waterfall, where requests fall through each regex until the requested url string finds a regex match.
Testing our Tweets endpoint
What if we send a POST request with they word Hey in the body to /v1/tweets?
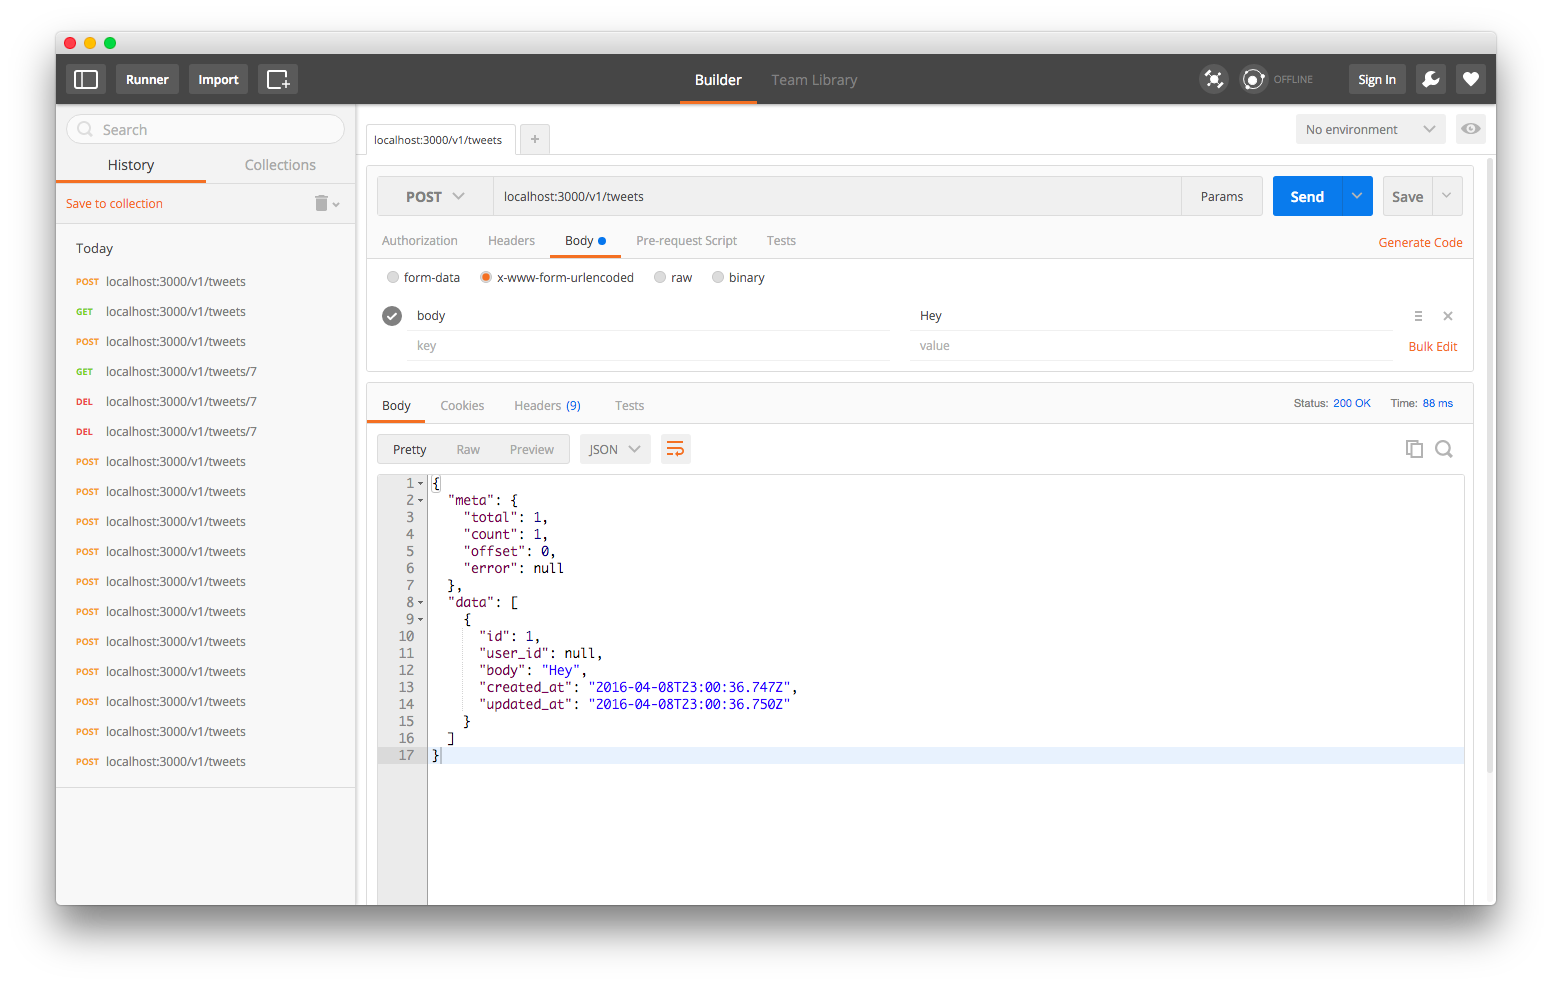
The /v1/tweets endpoint handles our POST request and responds with the data we sent in our POST request, which matches our definition of our tweet model. It also responds with an updated response metadata. All Nodal API responses adhere to this format.
 {
  "meta": {
    "count": 1,
    "offset": 0,
    "error": null
  },
  "data": [
    {
      "id": 1,
      "user_id": null,
      "body": null,
      "created_at": "2016-03-04T08:46:18.069Z"
    }
  ]
}
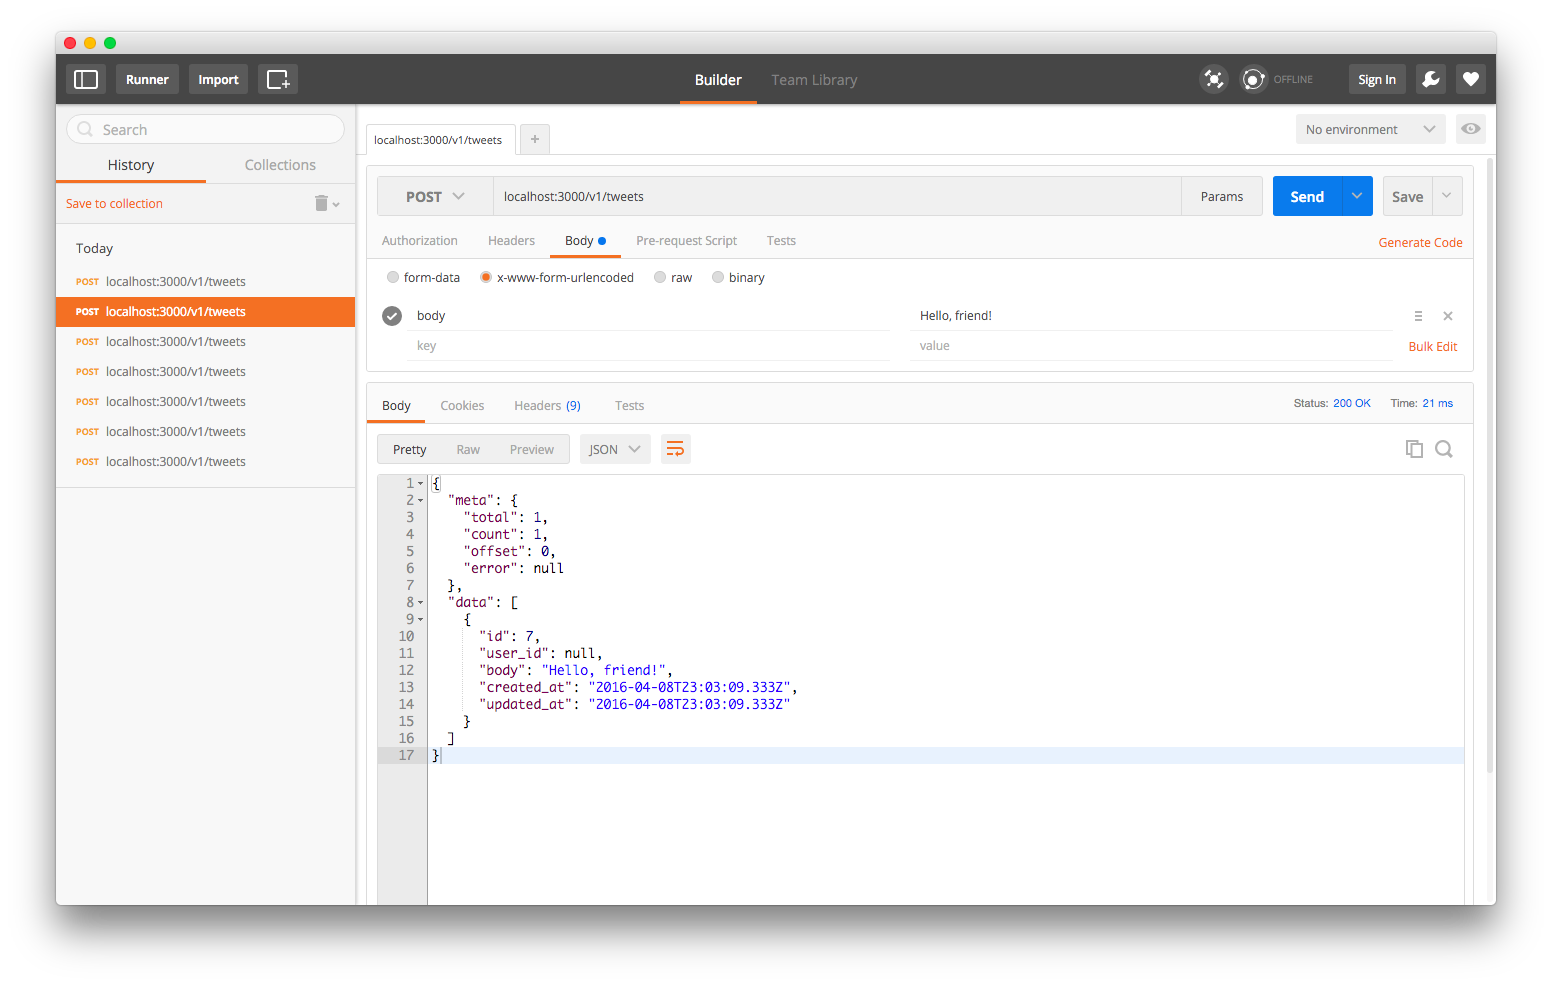
Creating tweets with actual content
Let’s keep on hitting the API with post requests containing some other text in the body:
“Hello”
“Hello, world!”
“Goodbye, world!”
“Goodbye, friend!”
“Hello, friend!”
We know we can create things. Cool!
API Input Validation
Nodal provides validation out of the box.
In our tweet model, we can add validation using the .validates method, which takes as arguments:
- the field to validate
- the text string to respond with in the case that validation fails
- and an anonymous function that will evaluate to true or false using the data in the designated input field.
Let’s validate the body of our POST request to make sure that it both exists and is longer than 5 characters.
// .app/models/tweet.js

Tweet.validates('body', 'must be at least 5 characters', v => v && v.length >= 5);
Then let’s test it!
Let’s POST “Hey!”
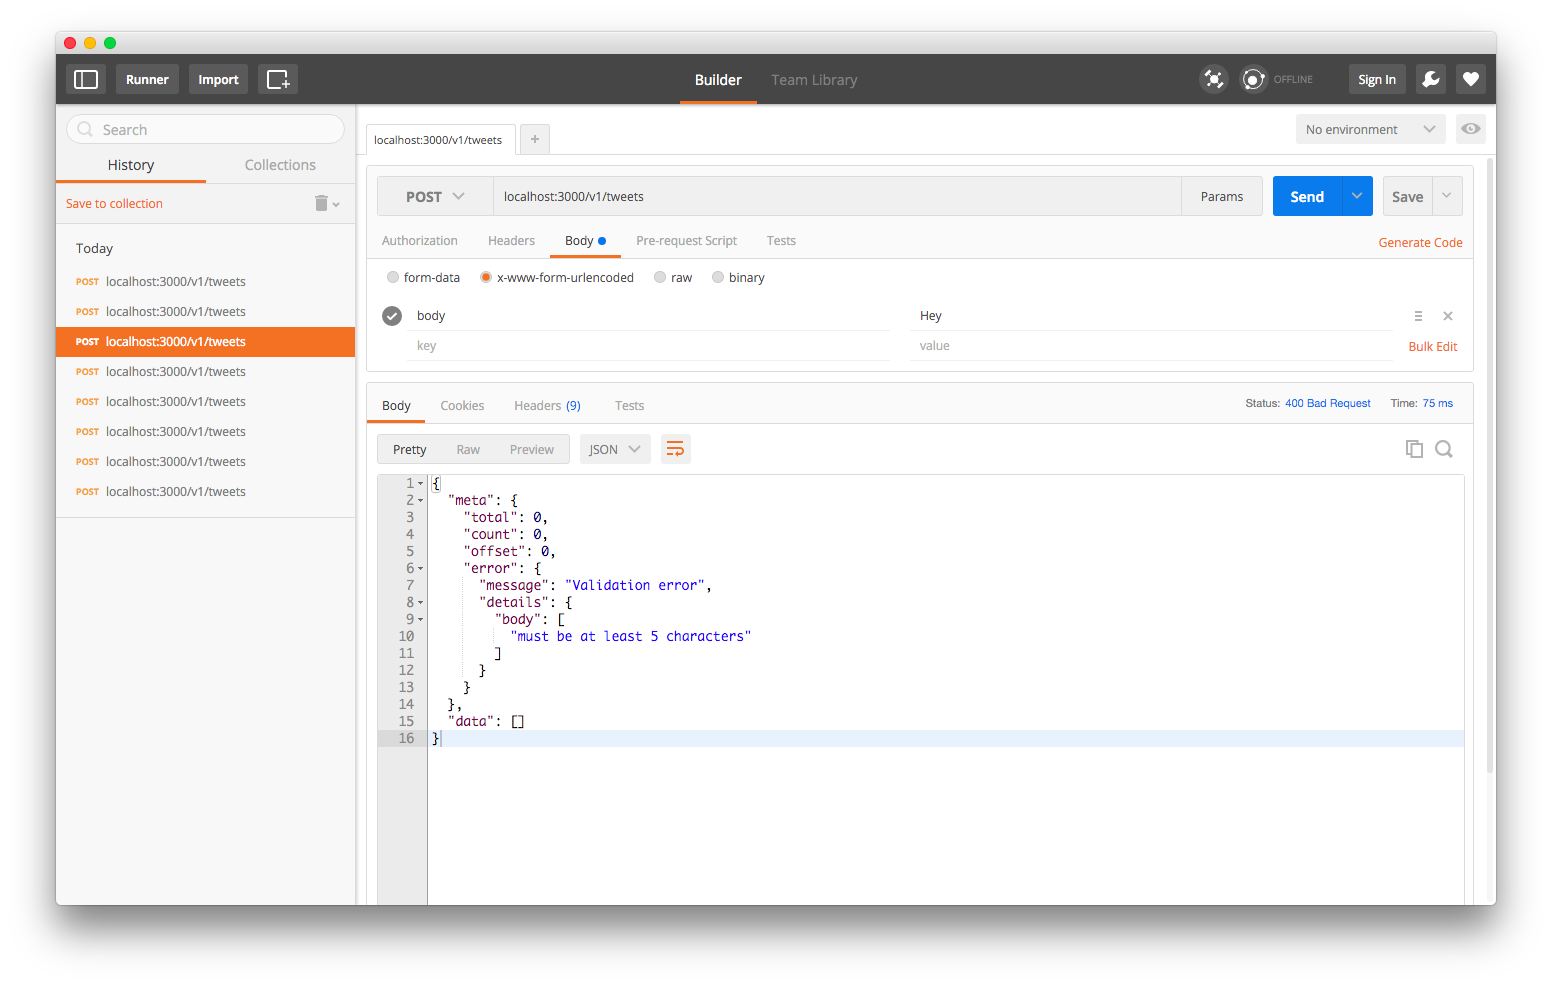
And we get a validation error!
Now let’s POST “Heyooo!”
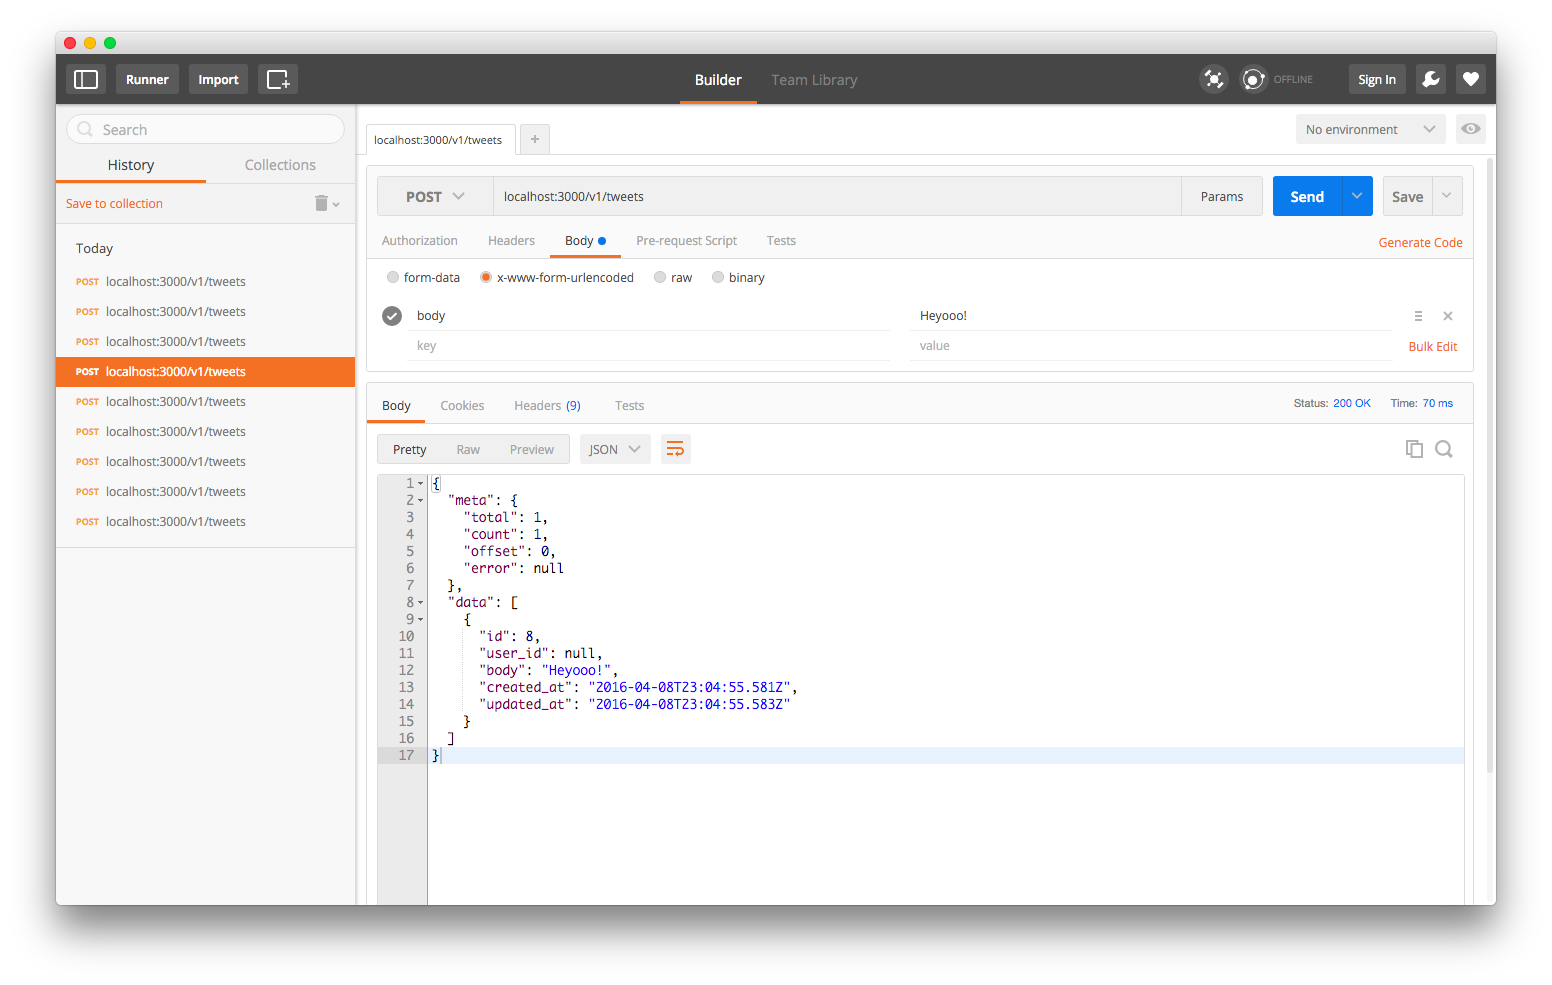
And it works.
Getting all of our tweets, and query strings
If we hit localhost:3000/v1/tweets with a GET request, we’ll get all of our tweets back to us in the body of the response.
Nodal comes with support for multiple query strings:
Here are a couple we can test:
localhost:3000/v1/tweets?body__not_null

localhost:3000/v1/tweets?body__startswith=he
Doesn’t work! Because the query is case sensitive.
localhost:3000/v1/tweets?body__startswith=He

localhost:3000/v1/tweets?body__endswith=friend!
For case insensitive we use iendswith:
localhost:3000/v1/tweets?body__iendswith=frieNd!
For integer values, we can do greater-than-or-equal-to queries
localhost:3000/v1/tweets?id__gte=3
This will give us a response containing all tweets for which the ID is greater-than-or-equal-to 3!
localhost:3000/v1/tweets?id__gte=3&__count=2

localhost:3000/v1/tweets?id__gte=3&__offset=2&__count=2
How’s this all working? Is this magic, or does the developer have fine grained control?
If we look in our tweets_controller.js file, what we see(ignoring all the autogenerated boilerplate) is the chain of methods invoked on the query params
// ./app/controllers/v1/tweets_controller.js

class V1TweetsController extends Nodal.Controller {
  index(){
    Tweet.query()
       .where(this.params.query)
       .end((err, models) => {

          this.respond(err || models);

      });
  }
}
We can actually specify conditions for the response directly as an option hash of properties passed to .where():
We can replace this.params.query with something like {id__gte: 3}:
// ./app/controllers/v1/tweets_controller.js

index() {

  Tweet.query()
  .where({id__gte: 3})
  .end((err, models) => {

    this.respond(err || models);
  });

}
Now no matter our query string, we’ll only get tweets that match the option hash passed to the .where() method. The query string and .where option hash argument syntax is borrowed directly from Django’s ORM.
Deleting Our Tweets
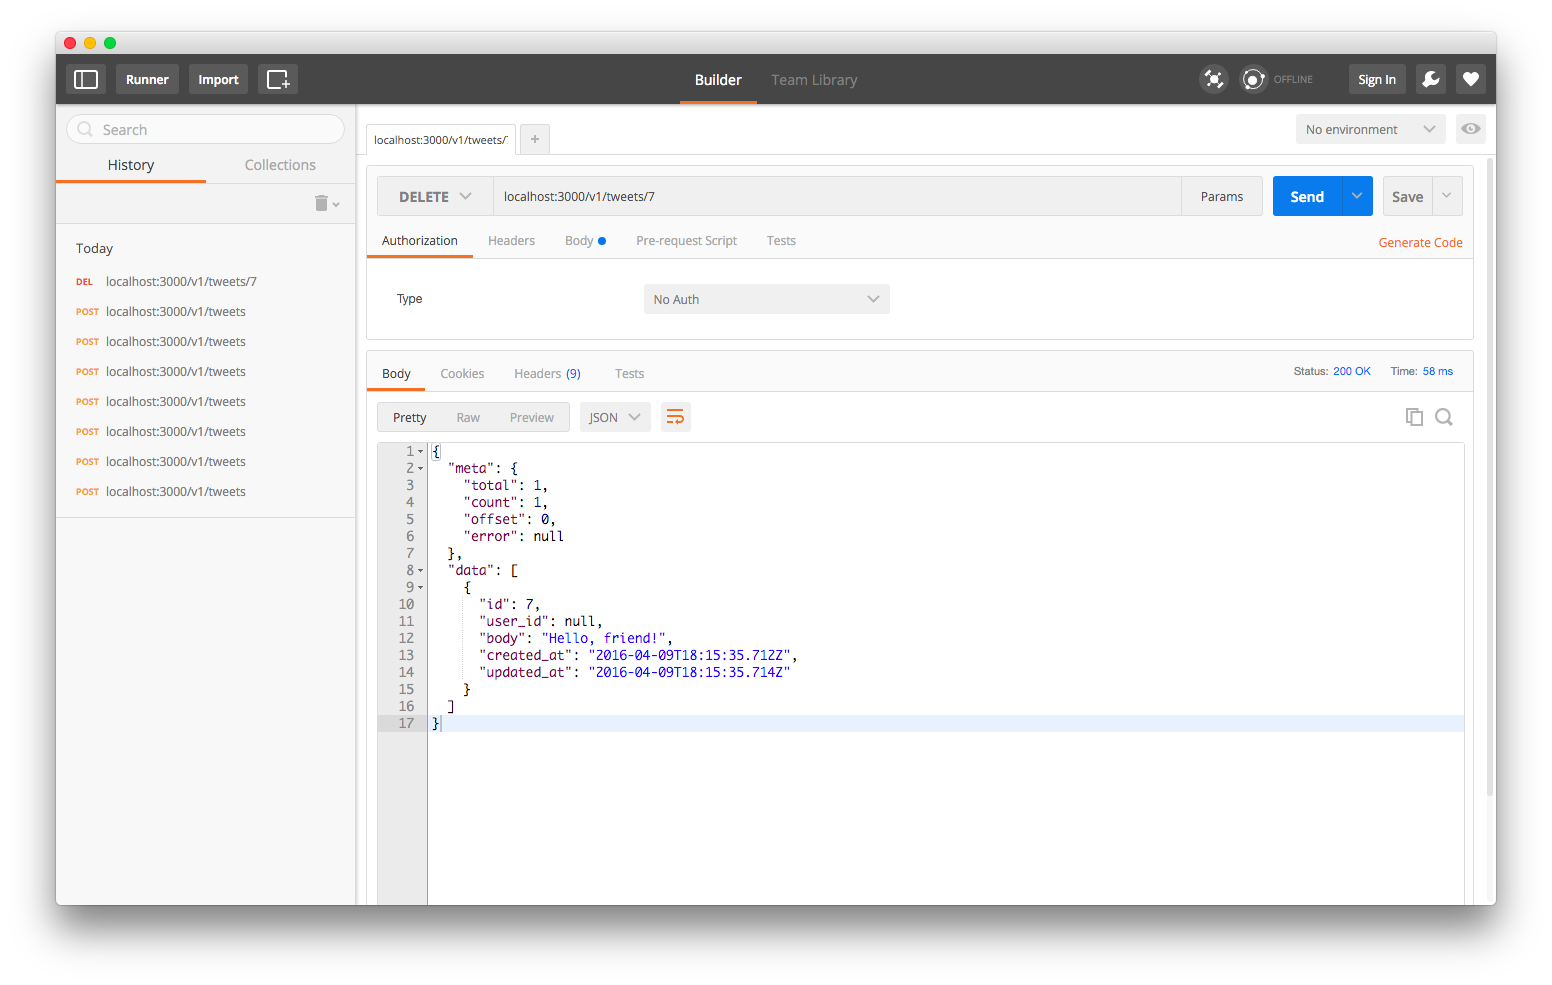
Using the exact same query string we can also DELETE a tweet using a DELETE request:
localhost:3000/v1/tweets/7
The Nodal server will respond with the tweet we’re deleting, which is the tweet with ID 7.
Let’s double check by sending another DELETE request using the same query string:
localhost:3000/v1/tweets/7
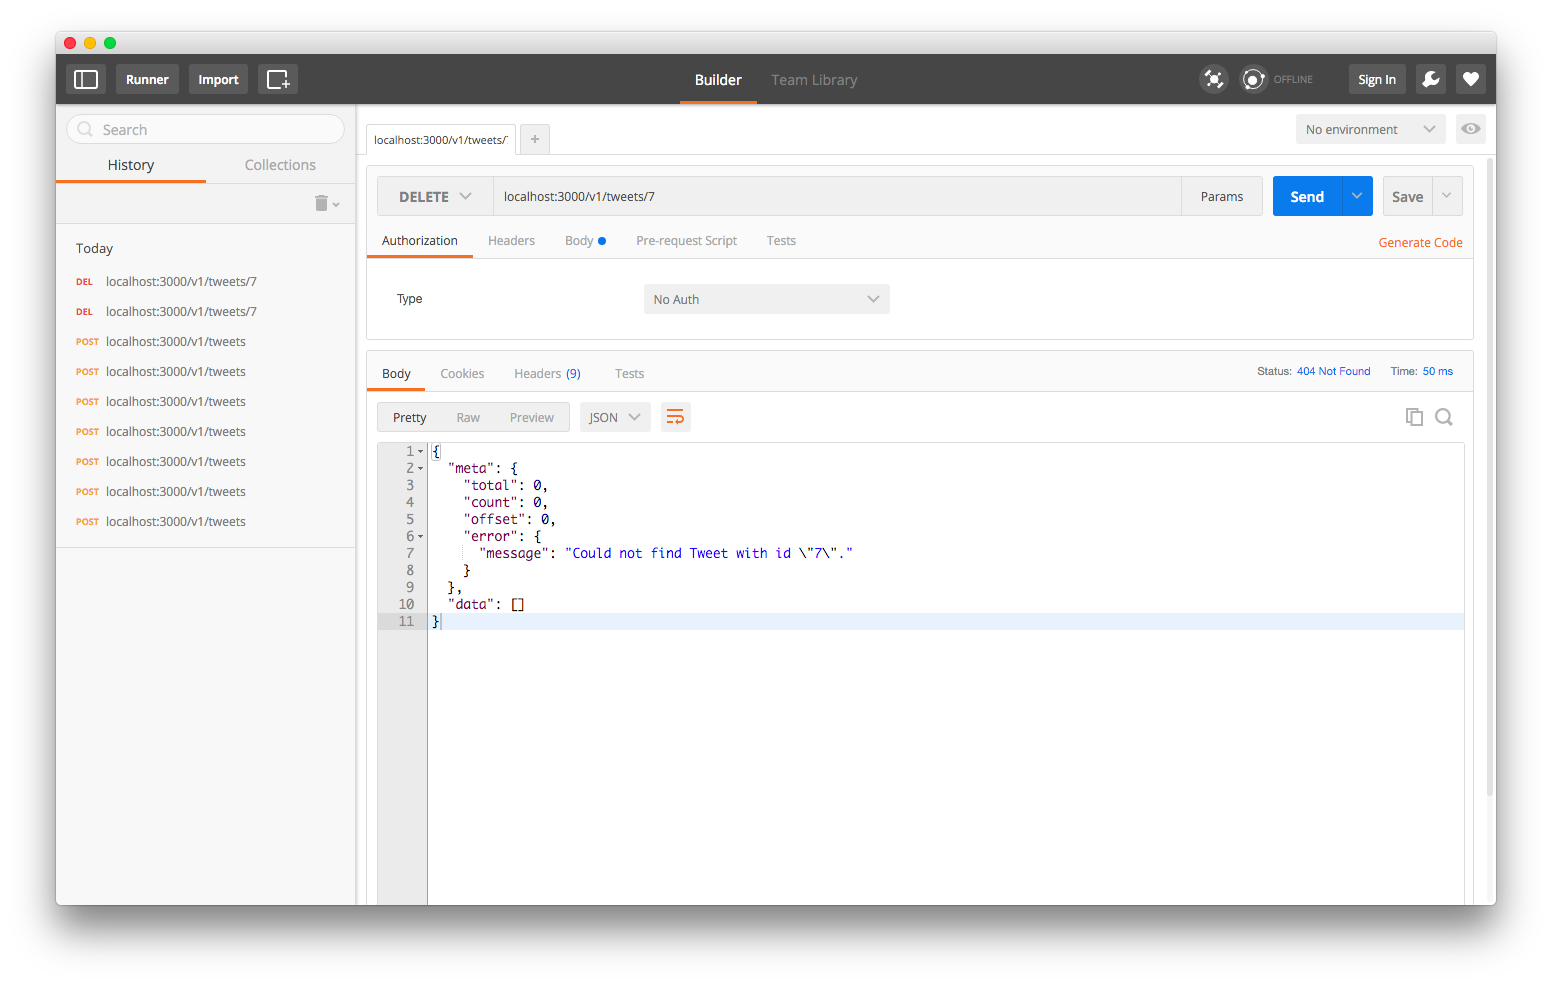
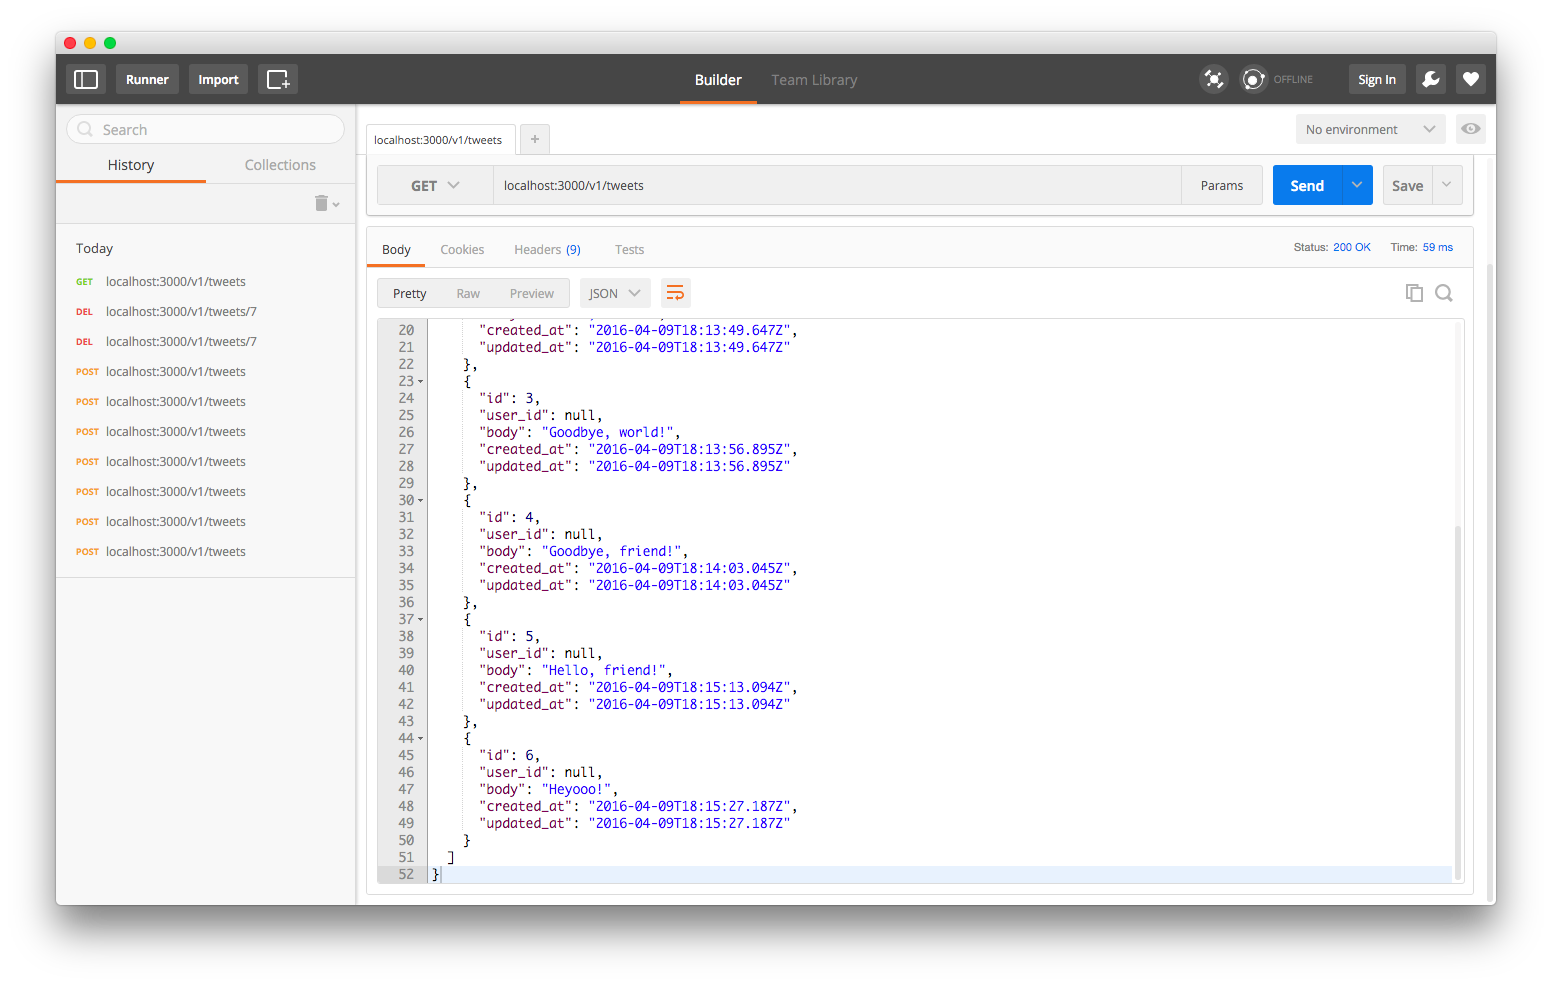
If we send a GET request to localhost:3000/v1/tweets we’ll see that our tweet with ID 7 is gone.
We can also go back through our server log, which is active in the terminal window where we started our nodal server, and we can see the log of the tweet being deleted.
DELETE FROM "tweets" WHERE ("id") = ($1) RETURNING *
[7]
29ms
That’s Enough to Get Started
The goal of these Nodal tutorials is to introduce you to Nodal’s command line generator methods, highlighting the structure of a Nodal server and dive into how to approach extending your Nodal server.
The ultimate goal isn’t just to learn the generator methods, but instead to empower a developer to pick up where the generators leave off and quickly build out a fully functional node.js based API.
We’ll go deeper into how to extend the generated code in part 2 where we create a user model and user authentication for our API.
As a sneak peak here’s how we generate our user model, using the same g:model command, but now with a new flag –user…
nodal g:model --user
…which will generate a new migration that contains our user table, add default validation for usernames and password inputs and download bcrypt for password encryption.
If you like Nodal, star and follow Nodal on github and follow Nodal’s creator @keithwhor. If you have comments or suggestions on this blog post, lemme know @nsipplswezey. Follow along for forthcoming part 2 and part 3.
Thanks to Keith Horwood for creating Nodal and reading a draft of this.
The Origional Screen-Cast
Footnotes
1: Throughout this post I use footnotes to point to implementation details that might distract you from the important bits of getting up and running with Nodal. These footnotes are intended to assist by demarcating something that can be intentionally ignored until later. This footnote format was based on dog-fooding this mixed screen-cast + technical blog post format, and realizing that the text layer of the blog needed to stay thin, to match the screencast. You can see my motivations for the format in this post and my outcomes in this post
2: Need Node version management? I recommend using nvm based on these instructions. Need Postgres? I recommend using Postgres.app.
3: If you’re looking for a discussion on IIFEs you can see a good and short conversation about it on Nodal’s Show HN discussion page.
4: Models are an abstraction that we can use in developing an API that help us manage data as it makes the round trip from client, to server, to database and back again. Models –in the context of object-relational-model(ORM)– encapsulate the logic, language and syntax for describing the intent of our API in a way that is consistent between the javascript written in our server and the SQL queries to our database. They create consistency, clarity, reliably and a separation of concerns within our server.
Models have a close relationship with two other concepts: schema and tables. A schema is a description of types of data, and the relationships that exist between data that we want to store. A table is the actual instance of that data, which adheres to the defined scheme.
5: At this point two questions might come to mind:
-
What is db/main.js actually doing?
-
What’s Nodal.my.Schema.models.Tweet and when and where is it created?
These are both good questions. You can find an answer to question #1 by looking in db/main.js. You can find an answer you question #2 at Nodal’s docs for the .setSchema method!
In essence, Nodal.my.Schema.model.Tweets is an object that represents the schema for the model and the table. And it will be generated when we run our migrations. That is it gets created on an invocation of up()!
If it seems at this point like this is a moment where you’ve lost granular control over the application, and you don’t know what’s happening under the hood of all these generator commands… don’t panic.
The strength of Nodal is that it is opinionated. It gives you good quick answers to hard problems, as long as you do it the Nodal way. That’s the “easy to get started” part. And the choice of tools, design patterns and abstractions implemented not only make it easy to get started, but also powerful out of the box.
Nodal is also transparent and explicit enough in it’s methods and its design patterns that an experienced developer can dig into the Nodal documentation and reason through what’s happening and extend as needed.
6: Question: When we migrate and rollback, do we lose all the data contained in our database in those prior migrations.
Answer: Yes. db:migrate and db:rollback seem to just invoke the up() and down() methods, which mean dropping and recreating tables. It would be cool if Nodal migrations implemented up() and down() in some clever immutable way, such that your application db history remained consistent between migrations. But so far as I know, it seems that a db:rollback drops the table of the most recent migration, and a db:migrate recreates that table from scratch.
Questions: When we db:create or db:prepare, do we lose all the data contained in our database prior to that create or prepare?
Answer: db:create will return an error if the database has already been created. db:prepare appears to drop all tables from prior migrations.