Nodal Part 2
A node.js Framework + Screen-cast + Technical Blog Post
This is part 2 of 3 posts to be paired with screencasts by Nodal creator Keith Horwood. The primary intention is to improve on the available technical material on the Nodal framework. The secondary purpose is to continue iterating on screencast + blog post format that pairs screen-cast video content with static text and code snippets.
See that little check box floating there in the right margin? Use it to toggle the accompanying screen-cast which this blog post follows. Or use ⌘-↑ to toggle and un-toggle the video layer, and use the space bar to play and pause the video layer when present. If you’re reading on mobile, the video is embedded at the end of the post. See motivations for this format after getting started with Nodal.
Getting Started With Nodal Pt. 2
We ended Pt. 1 of this 3 part blog series creating a Twitter API clone using Nodal with the following Nodal generator command
nodal g:model --user
Recap
Nodal is a Node.js API framework that borrows design patterns from Rails and Django, provides out-of-the-box Postgres integration, and provides a set of transparent core command line generators for building out APIs quickly.
At this point, we’ve generated:
- a node server
- running at localhost:3000
- with a tweet model
- and a tweet controller
- and a tweet table in our Postgres database
- using migrations for database versioning and management (a rails design pattern)
- with input validation for POST requests to the /tweets endpoint
- which is namespaced to /v1
- with query string support modeled (a django design pattern)
- with default GET, POST, UPDATE, DELETE functionality
All in about 20 minutes time.
The biggest barrier to building a full-featured API with Nodal is getting familiar with the Nodal’s server file structure, design patterns, command line generators and generated code.
These tutorials intend to highlight those features, and hopefully are a good enough guide to not only get you up and running with a basic server, but also clearly identify how to work with Nodal to build out your own production server
A User Model and Authentication
Now that we’ve covered the basics, the tutorial will speed up a bit.
Nodal provides a generator for creating the foundation of a user model. We can use Nodal’s command line generator flag –user to generate a user model. This flag does a lot under the hood, but at this point we’re equipped to reason through what Nodal generates. The Nodal command to generate a user model is:
$ nodal g:model --user
You’ll notice that this command takes a bit longer to run. That’s because Nodal is installing dependencies for password security, encryption and hashing; specifically the bcrypt package. As always Nodal logs the files that it generates:
Create: ./app/models/user.js
Create: ./db/migrations/2016041500085963__create_user.js
NOTE: If you run into problems with Nodal generators, remember that Nodal generators will log the changes made to your server. If, for example, you need to generate your user model again, you can remove the files that Nodal generated, and rerun generator commands from the command line. For example, if
$ nodal g:model --userthrows an error because installation of bcrypt required super user privileges, you can remove the generated files and then run$ sudo nodal g:model --user. Nodal generators are explicit, transparent and modular so that the developer can maintain fine grain control of their server.
As in our tweet model, Nodal generates a new migration in our db/migrations directory, which –upon migration– creates a users table with three fields.
-
email
-
password
-
username.
Additionally, if you inspect the generated migration code, you’ll see an example of setting properties on a data field in a Postgres table, and specifically that the email field must be unique.
//db/migrations/UTCTimestamp__create_user.js
module.exports = (function() {

  "use strict";

  const Nodal = require('nodal');

  class CreateUser extends Nodal.Migration {

    constructor(db) {
      super(db);
      this.id = 2016041423195808;
    }

    up() {

      return [
        this.createTable("users", [{"name":"email","type":"string","properties":{"unique":true}},{"name":"password","type":"string"},{"name":"username","type":"string"}])
      ];

    }

    down() {

      return [
        this.dropTable("users")
      ];

    }

  }

  return CreateUser;

})();
The Nodal model generator, with the –user flag also generated a user model for us. Ignoring the boiler plate, the generator created a model that requires the bcrypt package, implements a beforeSave() method, implements a password verification, sets our database and user model schema, and invokes two input validations on email and password inputs to our user API end point.
One step at a time that’s:
-
Requires the bcrypt package
-
Implements a
beforeSave()method. This method is invoked before data is saved to the database. -
Implements password verification.
-
Sets our database and user model schema.
-
Invokes two input validations on email and password inputs.
// ./app/models/user.js
module.exports = (function() {

  'use strict';

  const Nodal = require('nodal');
  const bcrypt = require('bcrypt');

  class User extends Nodal.Model {

    beforeSave(callback) {

      if (!this.hasErrors() && this.hasChanged('password')) {

        bcrypt.hash(this.get('password'), 10, (err, hash) => {

          if (err) {
            return callback(new Error('Could not encrypt password'));
          }

          this.__safeSet__('password', hash);
          callback();

        });

      } else {

        callback();

      }

    }

    verifyPassword(unencrypted, callback) {

      bcrypt.compare(unencrypted, this.get('password'), (err, result) => {
        callback.call(this, err, result);
      });

    }

  }

  User.setDatabase(Nodal.require('db/main.js'));
  User.setSchema(Nodal.my.Schema.models.User);

  User.validates('email', 'must be valid', v => v && (v + '').match(/.+@.+\.\w+/i));
  User.validates('password', 'must be at least 5 characters in length', v => v && v.length >= 5);

  return User;

})();
This might seem like a lot to parse. But we’re equipped to reason through it. Let’s try to narrow our scope a bit, by referencing pieces of this generated code that are similar to our tweets model:
Requiring bcrypt is pretty straightforward. The generator downloaded the bcrypt package into our node_modules folder. We’ll be using methods from the bcrypt package to compare and encrypt our passwords.
Setting the database and user model schema is part of the migrations design pattern. We can trust that our migrations handle the concerns of our database.
Additionally, we covered validations earlier, so we don’t need to pay close attention to the two invocations of User.validates().
That leaves the beforeSave() and the verifyPassword() methods!
In our beforeSave() method, if the request being handled by our user model is not throwing an error, and the password is being changed, we’ll handle any encryption errors, and encrypt the password followed by using __safeSet__ to set the password field of our user model to a hash of the password. __safeSet__ is just a set without validation.
verifyPassword() just uses bcrypt’s compare method to compare passwords sent to the user model.
Migration
To actually get our user model up and running, we just need to migrate!
$ nodal db:migrate
You should see output from Postgres in your console detailing the tables created.
Controller
Let’s see what happens if we try to hit our user endpoint with a GET request:
localhost:3000/v1/users
We’d get a 404!
Why? Because while we used Nodal to generate a model, we haven’t built a controller for that model.
We can create our controller for our specific user model using the same generator command as we did for our tweets, but specifying that our controller is for our User model.
$ nodal g:controller v1 --for User
You should see in your console the changes that the Nodal generator has made to your server:
Create: ./app/controllers/v1/users_controller.js
Modify: ./app/router.js
Nodal generated a new controller, and edited our router. This controller handles all of the same CRUD functionality that we had for our tweets, but now for our users! Also remember that we’ve name-spaced our controllers to v1, so your Nodal API server should now have an endpoint available at app/controllers/v1/users_controller.js file. It should be nearly identical to the tweets_controller.js file.
Creating users
Let’s make a GET request to localhost:3000/v1/users.
We get a response that indicates that we don’t have any users. Good!
{
  "meta": {
    "total": 0,
    "count": 0,
    "offset": 0,
    "error": null
  },
  "data": []
}
Now lets make an empty POST request to /v1/users
We get a validation error, telling us our email must be valid and our password must be at least 5 characters in length.
{
  "meta": {
    "total": 0,
    "count": 0,
    "offset": 0,
    "error": {
      "message": "Validation error",
      "details": {
        "email": [
          "must be valid"
        ],
        "password": [
          "must be at least 5 characters in length"
        ]
      }
    }
  },
  "data": []
}
Let’s send a valid email, password and username in our post request.
-
email = keithwhor@gmail.com
-
password = password
-
username = keithwhor
And what do we get?
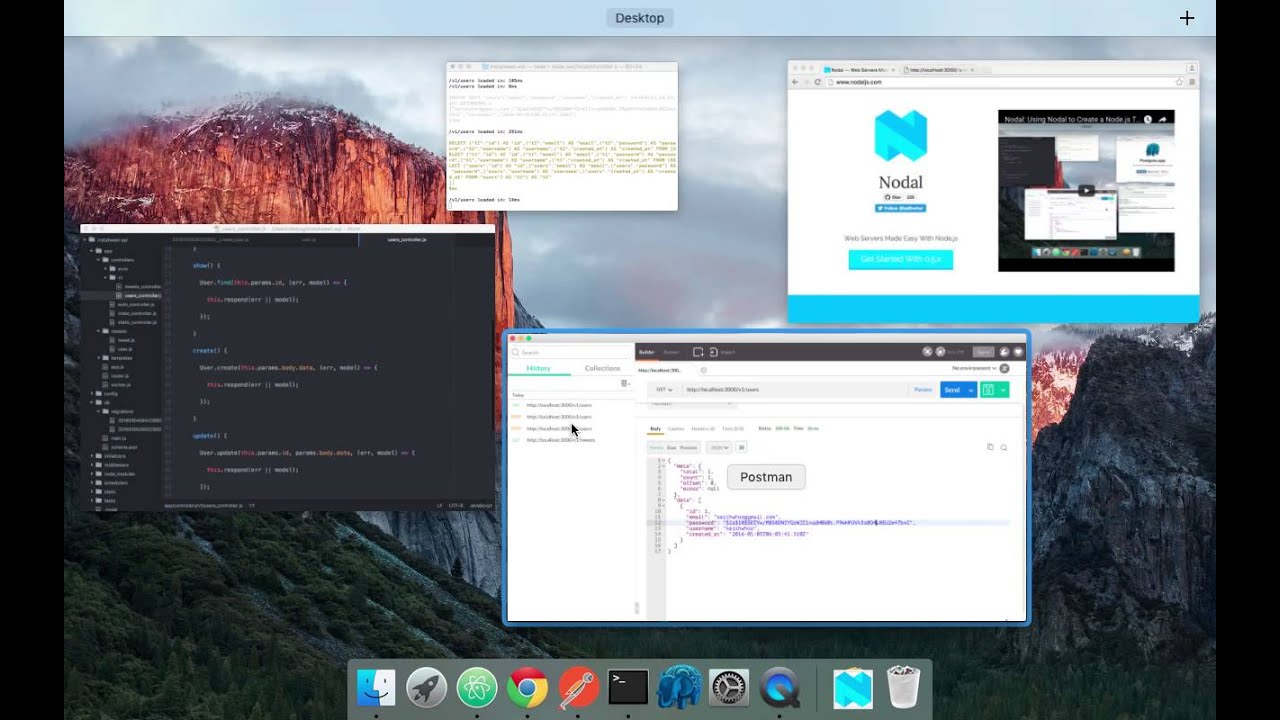
A response with our new user, indicating their email, their encrypted password and their username.
{
  "meta": {
    "total": 1,
    "count": 1,
    "offset": 0,
    "error": null
  },
  "data": [
    {
      "id": 1,
      "email": "keithwhor@gmail.com",
      "password": "$2a$10$iKYZj7e18yr7qmhFhPQYPuTstzeuct3SXQrEzdxc8qLUd.Vykt8fS",
      "username": "keitwhor",
      "created_at": "2016-04-08T23:01:12.835Z",
      "updated_at": "2016-04-08T23:01:12.984Z"
    }
  ]
}
Generally, we don’t want to be sending around hashes of our users passwords. Nodal generators, however, make no assumptions about API response fields. Generators intentionally leave these hashed passwords in the default response to allow the API developer to manage the concern of security as necessary. Nodal will get you set up with the right hashing and encryption tools, but it’s your job to make sure your Nodal server meets your security specification.
You can see that our Nodal API will respond to a GET request to /v1/users/ with this same information, since we only have one user at the moment:
{
  "meta": {
    "total": 1,
    "count": 1,
    "offset": 0,
    "error": null
  },
  "data": [
    {
      "id": 1,
      "email": "keithwhor@gmail.com",
      "password": "$2a$10$iKYZj7e18yr7qmhFhPQYPuTstzeuct3SXQrEzdxc8qLUd.Vykt8fS",
      "username": "keitwhor",
      "created_at": "2016-04-08T23:01:45.510Z",
      "updated_at": "2016-04-08T23:01:45.621Z"
    }
  ]
}
Let’s fix the response interface so that we don’t send the hashed password field in our response.
API Endpoint Response Interface
Our users_controller.js file is where we specify the response data to API requests. We can specify an interface to describe those responses. We can edit any of our responses by adding an array specifying what model data we want to send in our response. In this case we’ll add ['id','username','email','created_at'] as an argument to this.respond() on our index method in our users_controller.js file, which corresponds to a GET request to /v1/users/ endpoint.
// ./app/controllers/v1/users_controller.js
index() {

User.query()
  .where(this.params.query)
  .end((err, models) => {

    this.respond(err || models, ['id','username','email','created_at']);

  });

}
Now that we’ve specified this interface, our requests get a response that only contains the data specified in the array passed to the .respond() method. If we send a GET request to localhost:3000/v1/users we get the following response, which corresponds to the interface we specified in the controller.
{
  "meta": {
    "total": 1,
    "count": 1,
    "offset": 0,
    "error": null
  },
  "data": [
    {
      "id": 1,
      "username": "keitwhor",
      "email": "keithwhor@gmail.com",
      "created_at": "2016-04-15T16:52:54.835Z"
    }
  ]
}
We have fine grained control over what data we send whenever we respond with any sort of model. You might want to go specify the interfaces for the rest of the generated API endpoints in out users_controller.js file!
Associating Models
Now that we have tweets, and we have users, how do we use Nodal to associate tweets with users?
All of our tweets have a user_id associated with them. We can use that user_id field to associate tweets with a specific user, based on joining their IDs,
Not only that, we can do this right in our tweet model!
First we require our User model into tweet.js.
Then we can use the Nodal.Model.joinsTo method to join our tweet model to our user model, with a specification that a User has multiple tweets
// ./app/models/tweet.js
module.exports = (function() {

  'use strict';

  const Nodal = require('nodal');
  const User = Nodal.require('app/models/user.js');

  class Tweet extends Nodal.Model {}

  Tweet.setDatabase(Nodal.require('db/main.js'));
  Tweet.setSchema(Nodal.my.Schema.models.Tweet);

  Tweet.joinsTo(User, {multiple:true});

  Tweet.validates('body', 'must be at least 5 characters', v => v && v.length >= 5);

  return Tweet;

})();
joinsTo and {multiple:true} is a combination of two associations from Rails: has_many and belongs_to. Additionally Nodal is strict about being “bottom up” with joins. Because Nodal is explicit about dependencies, we need to avoid cyclical joins; Nodal won’t magically resolve them for you. Therefor the parent ID should always be in a child table, and never the other way around. Tweets belong to Users. Users are the parents, tweets are their children.
Therefor we always go to the child model, require the parent, and doChild.joinsTo(Parent, {multiple:true})
Query Strings on Joined Tables
Now we can do some fun things with our API.
localhost:3000/v1/tweets?user__username=keithwhor
This should give us all the tweets that share a user_id with the the id associated with the username “keithwhor”! Which at this point, is no tweets! None of the tweets that we sent in POST requests to our API had a user_id field. They all have a "user_id": null
{
  "meta": {
    "total": 0,
    "count": 0,
    "offset": 0,
    "error": null
  },
  "data": []
}
We can see this if we send a GET request to the /v1/tweets endpoint.
{
  "meta": {
    "total": 6,
    "count": 6,
    "offset": 0,
    "error": null
  },
  "data": [
    {
      "id": 1,
      "user_id": null,
      "body": "Hey",
      "created_at": "2016-04-08T08:35:29.229Z",
      "updated_at": "2016-04-08T08:35:29.236Z"
    },
    {
      "id": 2,
      "user_id": null,
      "body": "Hello",
      "created_at": "2016-04-08T08:43:41.132Z",
      "updated_at": "2016-04-08T08:43:41.137Z"
    },
    {
      "id": 3,
      "user_id": null,
      "body": "Hello, world\\!",
      "created_at": "2016-04-08T08:44:01.251Z",
      "updated_at": "2016-04-08T08:44:01.258Z"
    },
    {
      "id": 4,
      "user_id": null,
      "body": "Goodbye, world\\!",
      "created_at": "2016-04-08T08:44:43.373Z",
      "updated_at": "2016-04-08T08:44:43.379Z"
    },
    {
      "id": 5,
      "user_id": null,
      "body": "Goodbye, friend\\!",
      "created_at": "2016-04-08T08:45:13.263Z",
      "updated_at": "2016-04-08T08:45:13.269Z"
    },
    {
      "id": 6,
      "user_id": null,
      "body": "Hello, friend\\!",
      "created_at": "2016-04-08T08:46:12.063Z",
      "updated_at": "2016-04-08T08:46:12.067Z"
    }
  ]
}
Let’s take a second and use our API to set up some mock data. We want to demonstrate that our API can handle multiple users, each with multiple tweets. So let’s create a new user with a POST request to /v1/users with the following fields:
-
email = jill@gmail.com
-
password = password
-
username = jill
This is our second user, since we already created username keithwhor earlier.
Then let’s create 3 tweets for each user. This can be done in 6 POST requests to our /v1/tweets endpoint; 3 with user_id = 1 and 3 with user_id = 2.
With user_id = 1 lets post the following in the body:
“Hello!”
“Hello friend!”
“Hello world!!”
With user_id = 2 lets post the following in the body:
“Hey there!”
“Hey there friend!”
“Hey there world!!”
Now say we wanted the users data along with all of the users tweets?
Now we can query for tweets based on usernames. A GET request to:
localhost:3000/v1/tweets?user__username=keithwhor
Should give us:
{
  "meta": {
    "total": 3,
    "count": 3,
    "offset": 0,
    "error": null
  },
  "data": [
    {
      "id": 8,
      "user_id": 1,
      "body": "Hello!",
      "created_at": "2016-04-15T19:28:50.700Z",
      "updated_at": "2016-04-15T19:28:50.710Z"
    },
    {
      "id": 9,
      "user_id": 1,
      "body": "Hello friend!",
      "created_at": "2016-04-15T19:29:06.059Z",
      "updated_at": "2016-04-15T19:29:06.060Z"
    },
    {
      "id": 10,
      "user_id": 1,
      "body": "Hello world!",
      "created_at": "2016-04-15T19:29:11.157Z",
      "updated_at": "2016-04-15T19:29:11.157Z"
    }
  ]
}
And similarly a GET request to:
localhost:3000/v1/tweets?user__username=jill
Should give us:
{
  "meta": {
    "total": 3,
    "count": 3,
    "offset": 0,
    "error": null
  },
  "data": [
    {
      "id": 11,
      "user_id": 2,
      "body": "Hey there!",
      "created_at": "2016-04-15T19:29:26.779Z",
      "updated_at": "2016-04-15T19:29:26.779Z"
    },
    {
      "id": 12,
      "user_id": 2,
      "body": "Hey there friend!",
      "created_at": "2016-04-15T19:29:31.423Z",
      "updated_at": "2016-04-15T19:29:31.423Z"
    },
    {
      "id": 13,
      "user_id": 2,
      "body": "Hey there world!",
      "created_at": "2016-04-15T19:29:35.908Z",
      "updated_at": "2016-04-15T19:29:35.908Z"
    }
  ]
}
Joins and Response Interfaces
You’ll notice that while this query returns all the tweets belonging to the userid of the username passed to the query string, the response doesn’t actually contain the user information itself.
We can fix this easily by going to our tweets_controller and joining the user data into our index() method which handles GET requests to our tweets endpoint.
First we user the query composer join() method to join the user model into the response. Second, we also specify the interface for the response.
Let’s say in our response, we want to show the tweet id, body and created_at, and only show the user_id, username and created_at. Our interface for the Tweet model query() joined with the User model would be
['id', 'body','created_at', {user: ['id', 'username', 'created_at']}]


// ./app/controllers/v1/tweets_controller.js
module.exports = (function() {

  'use strict';

  const Nodal = require('nodal');
  const Tweet = Nodal.require('app/models/tweet.js');

  class V1TweetsController extends Nodal.Controller {

    index() {

      Tweet.query()
        .join('user')
        .where(this.params.query)
        .end((err, models) => {

          this.respond(err || models, ['id', 'body','created_at', {user: ['id', 'username', 'created_at']}]);

        });

    }

    ...

  }

}
The string passed to the .join() is a reference to the model we would like to join. The reference syntax is just the Camel-case of the class name that we want to join.
Now our request to /v1/tweets?user__username=keithwhor will respond with user data associated with each tweet.
{
  "meta": {
    "total": 3,
    "count": 3,
    "offset": 0,
    "error": null
  },
  "data": [
    {
      "id": 8,
      "body": "Hello!",
      "created_at": "2016-04-15T19:28:50.700Z",
      "user": {
        "id": 1,
        "username": "keithwhor",
        "created_at": "2016-04-15T19:16:09.301Z"
      }
    },
    {
      "id": 9,
      "body": "Hello friend!",
      "created_at": "2016-04-15T19:29:06.059Z",
      "user": {
        "id": 1,
        "username": "keithwhor",
        "created_at": "2016-04-15T19:16:09.301Z"
      }
    },
    {
      "id": 10,
      "body": "Hello world!",
      "created_at": "2016-04-15T19:29:11.157Z",
      "user": {
        "id": 1,
        "username": "keithwhor",
        "created_at": "2016-04-15T19:16:09.301Z"
      }
    }
  ]
}
Part 2 Conclusion
By this point, we’ve gotten quite a bit quicker at navigating our Nodal server file structure and the code generated by Nodal’s command line generators. We went a step deeper into migrations, we joined two models, we specified our API response interface, and we saw another example of operating on request input data that included encryption, verification and more request input validation!
While reading this blog probably took more than 20 minutes, and certainly more than that if you followed along with your own Nodal project, the screen-cast time for this content was about 11 minutes.
Keep that in mind as we continue to part 3 when we look at oauth and access tokens.
The Origional Screen-Cast